

Hey there! I'm an auto push pull cable supplier, and I get a lot of questions from folks about how to route these cables in their vehicles. It might seem like a daunting task, but with a bit of know - how, you can get it done smoothly. In this blog, I'll walk you through the process step by step.
Why Routing is Important
Before we dive into the actual routing process, let's talk about why it's so crucial. Proper cable routing ensures that your auto push pull cables work efficiently. If the cables are routed incorrectly, they can get kinked, damaged, or experience excessive friction. This not only shortens the lifespan of the cables but can also lead to malfunctions in the systems they control. For example, in a throttle control system, a poorly routed cable might cause inconsistent throttle response, which is a major safety issue.
Tools You'll Need
First things first, gather the tools you'll need for the job. You'll want a good set of wrenches, some zip ties, a cable cutter (if you need to trim the cable to the right length), and a flashlight. A socket set can also come in handy if you need to remove any parts to access the routing path. Oh, and don't forget a pair of gloves to protect your hands from any sharp edges.
Planning the Route
The key to successful cable routing is planning. Start by identifying the starting and ending points of the cable. In most vehicles, the starting point could be a control lever, like a gear shift or a throttle lever, and the ending point could be a component that needs to be actuated, such as a transmission or a carburetor.
Take a good look at the vehicle's interior and engine compartment. Look for any existing cable runs or wiring harnesses that you can use as a guide. You want to avoid areas that are prone to high heat, like the exhaust system, or areas where the cable could get pinched, such as between moving parts.
Also, think about the length of the cable. You don't want it to be too long and end up with a saggy cable that can get caught on things, but you also don't want it to be too short, which can put unnecessary stress on the cable and its connections.
Choosing the Right Accessories
When routing your auto push pull cable, you'll often need some accessories to make the job easier and ensure a secure connection. For example, Zinc Alloy Die Casting Joints are great for connecting the cable to other components. They're durable and can withstand a lot of wear and tear.

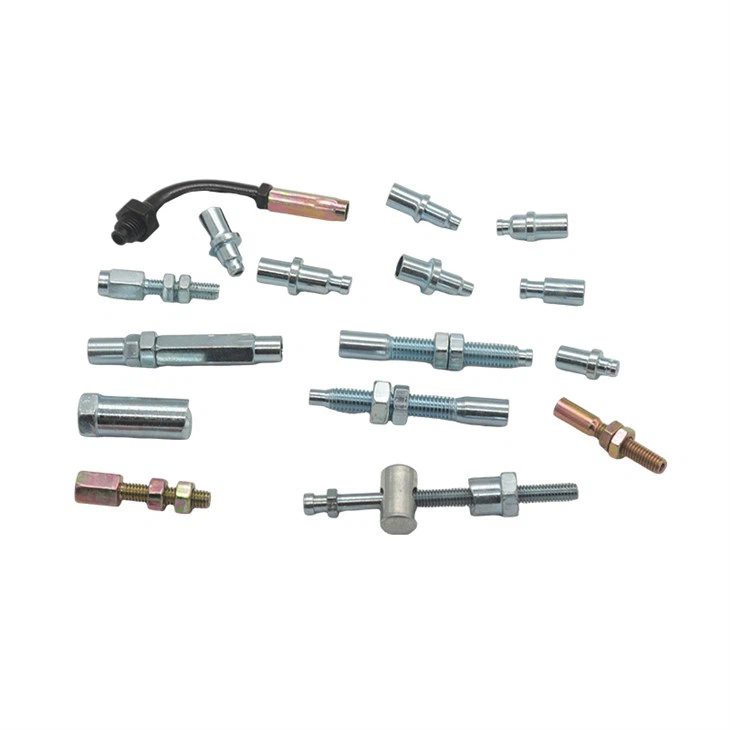
Cable End Fitting is another important accessory. It helps to keep the end of the cable in place and prevents fraying. And if you need to adjust the length of the cable later on, Adjustable Screw Joint is the way to go. These joints allow you to fine - tune the cable length without having to cut or re - attach anything.
The Routing Process
Now that you've planned your route and gathered your tools and accessories, it's time to start routing the cable.
- Prepare the Cable: If the cable is too long, use your cable cutter to trim it to the appropriate length. Make sure to leave a little extra length just in case you need to make adjustments later.
- Start at the Beginning: Begin at the starting point of the cable, which is usually the control lever. Attach the appropriate end fitting or joint to the cable and then connect it to the lever. Make sure the connection is tight and secure.
- Follow the Planned Route: Slowly guide the cable along the route you've planned. Use zip ties to secure the cable to existing wiring harnesses or other stable points. Try to keep the cable as straight as possible to minimize friction.
- Avoid Obstacles: As you're routing the cable, be on the lookout for any obstacles. If you come across a sharp edge, use a cable protector or a piece of rubber tubing to prevent the cable from getting damaged.
- Connect to the End Point: Once you've reached the end point, attach the cable to the component using the appropriate joint or fitting. Again, make sure the connection is tight and secure.
Testing the Cable
After you've routed the cable, it's important to test it to make sure it's working properly. If it's a throttle cable, for example, open and close the throttle a few times and make sure the response is smooth. If it's a gear shift cable, shift through the gears and check for any binding or resistance.
If you notice any issues, go back and check the routing. Make sure the cable isn't kinked or pinched, and that all the connections are secure. You may need to make some adjustments to the length of the cable or the position of the zip ties.
Maintenance Tips
Once you've successfully routed your auto push pull cable, you'll want to keep it in good condition. Regularly inspect the cable for any signs of wear, such as fraying or corrosion. Check the connections to make sure they're still tight.
If you notice any issues, don't hesitate to replace the cable or the accessories. It's better to address small problems before they turn into big ones.
Conclusion
Routing an auto push pull cable in your vehicle isn't as hard as it might seem. With a bit of planning, the right tools, and some basic knowledge, you can get the job done. Remember to choose the right accessories like Zinc Alloy Die Casting Joints, Cable End Fitting, and Adjustable Screw Joint to ensure a secure and efficient installation.
If you're in the market for high - quality auto push pull cables and accessories, we're here to help. We've got a wide range of products to meet your needs. Whether you're a DIY enthusiast or a professional mechanic, we can provide you with the right cables and parts for your vehicle. If you have any questions or want to discuss your requirements, don't hesitate to reach out. We're always happy to have a chat and help you find the best solutions for your cable routing needs.
References
- "Automotive Electrical and Electronic Systems" by William H. Crouse and Donald L. Anglin
- "How to Restore Your Muscle Car" by Jim Smart